Electric Scooter Maintenance Schedule: The Jobs That Prevent Failure at Speed
Electric scooter maintenance schedule covering stem bolt torque checks, brake pad intervals, tyre pressure and the folding mechanism service that prevents failure.
Electric Scooter Maintenance Schedule: the Jobs That Prevent Failure at Speed
The most dangerous assumption new owners make about an electric scooter is that it requires no maintenance. They take delivery, unfold it, charge it, and ride until something stops working at 25 km/h. The folding joint seizes. A brake cable frays internally at the fold point. The stem clamp develops enough play to crack the aluminium casting. Every one of those failures is preventable with a known service interval. An electric scooter maintenance schedule exists. Ignoring it turns a commuter vehicle into a disposable liability.
The work splits into two categories: jobs that keep the vehicle safe at speed, and jobs that extend component life. The safety-critical tasks have defined intervals measured in kilometres or calendar time: stem bolt torque check, brake pad replacement, tyre pressure inspection. The second category runs on condition: bearing preload adjustment, folding joint service, hydraulic disc bleeding. Neither category is optional.
The Folding Joint: Highest-Consequence Mechanical Connection on the Vehicle
Every electric scooter develops headset play in the folding assembly eventually. The stem clamp and latch pin wear under load. The result is a wobble that feels like a loose steering head. Riding with a loose clamp accelerates fatigue cracking in the cast aluminium folding base and stem tube weld. That produces a sudden stem snap, documented on early Kaabo Mantis units and some Apollo City models. It happens at speed, not in the garage.
Stem Clamp Bolt Torque: First Check at 30 km
Torque the stem clamp bolts before the first ride and again at 30 km. For M6 bolts, the spec is 8-10 Nm. For M8 bolts, 15-20 Nm. The handlebar clamp bolts follow the same pattern: M5 at 5-7 Nm, M6 at 8-10 Nm. Use a torque wrench, not feel. Under-torque lets the clamp slip. Over-torque strips the threads or cracks the plastic locking collar, which embrittles below -5°C.
Latch Pin and Folding Hook: Check Every 500 km
The latch pin, cast zinc alloy or sintered steel depending on the model, rounds at the hook interface under repeated over-tightening. The auto-latch spring fatigues between 3,000 and 5,000 cycles on a typical commuter scooter. Once the latch fails to engage positively, the stem can collapse when the front wheel hits a pothole. Apply NLGI 2 lithium grease or a plastic-safe silicone grease to all friction surfaces at every 500 km service. Factory grease is absent on most units. Creaking from the joint is the first sign it has gone dry.
Stem Folding Assembly Service: Tighten or Replace
If the clamp lever pivot bolt loosens or the threads strip, replace the part. Thread-locker on reused bolts does not recover stripped threads. The stem telescoping inner tube slips when the clamp wears past its grip range. Check the stem tube for cracking at the weld to the folding base, a known failure point on 6061 aluminium frames. The safety pin diameter is 6 mm or 8 mm depending on the design. If the pin does not seat fully, do not ride. Deck-to-stem base bolts torque to 20-25 Nm (M8) and often come without thread-locking compound from the factory on budget models. Apply Loctite 242 (blue, medium strength) to every structural bolt and let it cure 24 hours at 22°C before loading the joint.

Electric Scooter Tyre Pressure Check: Pinch Flats and Range Loss
Tyre type determines the maintenance interval and the consequence of neglecting it. Pneumatic tyres require a pressure check every two weeks. Below 2.0 bar (29 psi) on a 10-inch tyre, a square-edge impact over 50 mm produces a pinch flat: the tube gets trapped between the rim and the obstacle and punctures on both sides. Under-inflation also increases rolling resistance, which cuts real range. Ninebot Max G30 owner reports on community forums show a 15-20 percent range drop at 1.5 bar versus the recommended 3.0 bar.
Pneumatic Tyres: Pressure and Repair
Tubed tyres operate at 2.5-4.0 bar (36-58 psi), varying with rider weight and tyre width. Tubeless tyres use 2.0-3.5 bar (29-50 psi). The bead seats at 3.0-4.0 bar (43-58 psi) for initial pop. Tubeless sealant, latex-based, 60-120 ml per tyre, handles punctures up to 3 mm, but the sealant coagulates and requires refresh every 3 to 6 months depending on climate. For a tubed tyre, carry a patch kit with vulcanizing patch and sandpaper, or a spare tube (butyl with Schrader valve, 10×2.125 or 10×2.50 inch). A metal-core tyre lever set (2-3 pieces, 200-250 mm length) is enough to break the bead on tubed tyres. For tubeless, use nylon levers (3 pieces, 150-200 mm) to avoid damaging the rim tape.
Solid Tyres: The Ride-Quality Trade-Off You Cannot Fix
Solid tyres, polyurethane, Shore hardness 70A-85A, transmit every road vibration directly to the stem, deck, and electronics. That vibration accelerates solder-joint fatigue on the controller and dashboard display ribbon cable, which fractures after 500-1,000 fold cycles on models like the Unagi Model One. It also speeds stem-clamp wear. Solid tyres eliminate punctures but introduce a structural durability problem that no maintenance schedule solves. The tyre itself can de-bond from the hub under heat and shear stress, separating and leaving you with no drive and reduced braking. If you ride on solid tyres, inspect the bonding seam monthly. Chunking, pieces of polyurethane breaking off, is the precursor to de-bonding.
Electric Scooter Brake Pad Replacement: Mechanical and Hydraulic Disc
Brake maintenance divides by brake type. The wrong type for your use case creates real stopping-distance problems. At 25 km/h on dry asphalt, real braking distance for an 85 kg rider is 6-8 metres, not the 4 metres manufacturers claim. Worn or out-of-adjustment brakes double that distance.
Mechanical Disc Brakes: Pad Replacement and Cable Tension
Mechanical disc brakes, standard on most mid-range models including the Xiaomi Mi 1S, Ninebot F-series, and Vsett 8, require pad replacement when the friction material wears to 1.5 mm thickness. Organic (resin) pads wear faster than sintered metal but stop quieter. Cable tension adjustment compensates for cable stretch: tighten the barrel adjuster until the caliper arm moves the pad to within 0.5 mm of the rotor, with no drag when the wheel spins freely. The brake cable itself fails at the fold point. Cable routing through the folding assembly frays the stainless steel inner wire (1.5 mm or 1.8 mm diameter) internally, and it snaps without visible outer housing damage. Replace the cable every 1,500 km or at the first sign of notchy lever feel. Brake caliper mounting bolts (M6, 8-10 Nm) and disc rotor bolts (M5, 5-7 Nm) come with inadequate thread-locking compound from the factory on many models.
Hydraulic Disc Brakes: Bleeding and Seal Leaks
Hydraulic disc brakes, found on the Kaabo Mantis Pro, Dualtron Victor, and Nami Burn-E, require bleeding when lever feel goes spongy. The fluid type matters: DOT 4 or mineral oil, not interchangeable by brand. Using mineral oil in a DOT system swells the seals. Brake lever piston seal leaks appear as fluid on the lever body; the seal swells from contamination or degrades from age. Hydraulic hoses are braided stainless or Kevlar-reinforced polymer. Inspect for abrasion where the hose passes through the folding joint. Cable actuation on hydraulic systems shares the same folding-joint fraying risk as mechanical cables.
Electronic and Drum Brake Failure Modes
Electronic-only brakes (regenerative braking) fail when the battery is at full charge. There is nowhere to dump the energy, so the controller disables regen. Some models route the excess as heat through a resistor, but continuous downhill braking above 500 W dissipation overheats that resistor. Electronic braking is a range extender at best; it cannot be the sole braking system. Drum brakes, on some budget models, suffer shoe glazing from heat: the friction compound hardens and loses bite. Brake disc warping (runout above 0.3 mm) causes pulsing at the lever. Measure with a dial indicator, or replace the disc if the scooter has seen hard stops with a hot rotor.
Electric Scooter Bearing Wear and Bolt Loosening: the Vibration Problem
Vibration loosens every fastener on an electric scooter eventually. The problem is systemic: inadequate thread-locker at the factory affects motor axle nuts, brake caliper bolts, and stem clamp bolts across almost all brands. The failure pattern appears in community documentation for the Kaabo Wolf Warrior, Dualtron Thunder, and Vsett 9. Loctite 242, blue, medium strength, is the repair. Apply to every threaded fastener at the first full service. Breakaway torque on M6 is 6-10 Nm; on M8 it is 15-23 Nm. Cure time is 24 hours at 22°C before the joint sees load.
Wheel Bearing Wear: 608ZZ and 6001ZZ
Wheel bearings, common sizes are 608ZZ (8×22×7 mm) and 6001ZZ (12×28×8 mm), wear when radial clearance exceeds 0.05 mm. The symptom is a rough, grainy feel when spinning the wheel by hand. ABEC-5 or ABEC-7 rated bearings last longer but require NLGI 2 lithium complex grease repacked every 2,000 km or whenever water ingress is suspected. Rear axle nut torque is 35-45 Nm for 12 mm axles, 50-60 Nm for 14 mm axles. Under-torque lets the hub motor rotate on the axle, twisting the phase wires at the connector (MR30 or MT60 bullet connectors, 3.5 mm or 4.0 mm pins) until the solder joint fatigues or the connector melts from resistance above 0.1 ohm.
Hub Motor and Controller Heat
Hub motor magnet adhesive fails when internal temperature exceeds 80°C. This happens during sustained hill climbing on a hot day, especially on single-motor scooters like the Ninebot Max G30. The controller MOSFETs short above 25 A per FET on 48 V systems. The scooter cuts power without warning; recovery requires cooling and often a controller replacement. The motor phase wire connector melts at 3.5 mm or 4.0 mm bullet terminals if resistance spikes from corrosion or loose fit. Water ingress kills controllers and BMS units; the failure may appear days after exposure when corrosion bridges a trace on the PCB. IP ratings are component-level: IP54 on the deck and motor, IPX5 on the display. No scooter is truly waterproof regardless of claims.
Bolt Torque Specifications and Thread-Locker Application
The numbers that prevent structural failure at speed are these:
- Stem clamp bolt (M6): 8-10 Nm
- Stem clamp bolt (M8): 15-20 Nm
- Front axle nut (12 mm axle): 35-45 Nm
- Front axle nut (14 mm axle): 50-60 Nm
- Brake caliper mount (M6): 8-10 Nm
Use a torque wrench that clicks or beams, not a guess. The suspension linkage bolt (M8) torques to 20-25 Nm; the shock mount (M6) to 8-10 Nm. Deck-to-stem base bolts (M8, 20-25 Nm) and folding stem hook/latch bolts (M5, 4-6 Nm) come without thread-locking compound on budget models. Apply Loctite 243 (oil-tolerant blue) if Loctite 242 is unavailable. Do not use thread-locker on bearing surfaces or fastener interfaces that require disassembly for service. Red thread-locker requires heat to break, which damages aluminium threads.
The Battery: Degradation, Storage, and Charging Safety
Battery capacity degrades with both cycle count and calendar age. The rate depends on how you treat it. The cells are 18650 cylindrical lithium-ion (Samsung 35E, LG MJ1, or Panasonic NCR18650GA), configured in 13S (48 V nominal) for most commuters. High-performance models use 21700 cells (Samsung 50E or Molicel P42A) in 16S (60 V nominal). Claimed cycle life to 80 percent capacity is 500-800 cycles. Real-world results for scooters that are fast-charged or stored at 100 percent charge in heat are 300-400 cycles. Heat and high state-of-charge storage accelerate degradation faster than cycle count does.
Storage and Charging Rules
Store the battery at 50-60 percent charge if the scooter sits more than a week. Storage at 100 percent in summer heat reduces capacity measurably in 30 days. Do not charge unattended. Battery fire during charging is rare but catastrophic, caused by cell damage, BMS failure, or use of a charger with the wrong voltage. Charger output voltage must match the pack: 54.6 V for 13S, 58.8 V for 14S, 67.2 V for 16S. A charger with the correct DC barrel plug (5.5×2.1 mm or 5.5×2.5 mm) but wrong voltage can supply 67.2 V into a 54.6 V pack, which overcharges the cells. Charging port melt comes from arcing at a loose connector. Replace the port when the fit feels sloppy.
BMS Lockout and Cell Imbalance
BMS lockout occurs when the voltage delta between parallel cell groups exceeds 0.1 V. The BMS prevents charge or discharge to protect the cells. A bench reset or BMS replacement is the fix; there is no owner-level reset procedure that works across brands. The dashboard communication protocol (UART one-wire or CAN bus) governs how the BMS talks to the display. A lockout often shows no error on the dashboard. BMS passive balancing current is 50-100 mA, meaning it balances slowly during the final part of a charge cycle. If one group drifts, only multiple slow charges (0.5 A, 1 A) will restore balance. Fast charging (3 A, 5 A) skips the balance phase.
The single thing that most often goes wrong across all electric scooters is bolt loosening from vibration, compounded by inadequate thread-locking compound from the factory. It affects motor axle nuts, brake caliper bolts, and stem clamp bolts. Apply Loctite 242 to every structural fastener at the first service. The maintenance schedule that prevents failure at speed is three checks on the stem, two on the tyres, and one on the brakes, on a schedule measured in kilometres, not months.
Common Questions
How often should I check the stem clamp bolt torque on my electric scooter?
Torque the stem clamp bolts before the first ride, then at 30 km, then every 500 km or whenever you feel stem wobble (headset play). For models with M6 bolts, torque to 8-10 Nm. For M8 bolts, 15-20 Nm. Riding with a loose clamp accelerates fatigue cracking in cast aluminium folding bases.
What is the correct tyre pressure for my electric scooter to prevent pinch flats?
Pneumatic tyres: 2.5-4.0 bar (36-58 psi) for tubed tyres, 2.0-3.5 bar (29-50 psi) for tubeless. A tubeless tyre below 2.0 bar (29 psi) on a 10-inch rim with a square-edge impact over 50 mm will pinch flat the tube. Check pressure every two weeks.
How do I know when the brake pads need replacement on my scooter?
Replace mechanical disc brake pads when the friction material is 1.5 mm thick or thinner. Look through the caliper. Organic (resin) pads wear faster than sintered metal. On hydraulic systems, lever feel going spongy means the system needs bleeding, not just pads.
My folding mechanism creaks when I turn the handlebars. What is wrong?
The creak comes from dry friction surfaces in the folding joint. Most scooters ship without grease at the factory. Apply NLGI 2 lithium grease or a plastic-safe silicone grease to the latch pin, hook interface, and pivot points. If creaking returns, check for latch pin wear (cast zinc alloy or sintered steel) and replace if rounded.
What causes my scooter's steering to feel loose or wobbly?
Stem wobble is headset play from bearing wear or inadequate preload in the folding assembly. Check the stem clamp bolt torque first. If the wobble persists, the latch pin or pivot bolt is worn; replace it. Riding with wobble accelerates stem tube cracking at the weld to the folding base on 6061 aluminium frames.
How often should I grease or service the wheel bearings?
Wheel bearings (608ZZ or 6001ZZ) need repacking with NLGI 2 lithium complex grease every 2,000 km or whenever water ingress is suspected. A rough, grainy feel when spinning the wheel means radial clearance has exceeded 0.05 mm. Replace the bearing. ABEC-5 or ABEC-7 rated bearings last longer.
My battery stopped charging. Is it the BMS or the charger?
If the charger shows no output (no green light, no fan), test with a multimeter at the DC barrel jack (5.5×2.1 mm or 5.5×2.5 mm, centre positive) for rated output voltage: 54.6 V for 13S, 67.2 V for 16S. If voltage is present, the BMS charge MOSFET has failed. This is the most common BMS electrical fault: the battery will still discharge, but it will not accept a charge. A bench reset or BMS replacement is required.
Read next
-
 How to Choose an Electric Scooter: Brakes, Range and Carry Weight First
How to choose an electric scooter by the specs that matter: real range for your weight, brake types for wet stopping, and carry weight for daily use.
How to Choose an Electric Scooter: Brakes, Range and Carry Weight First
How to choose an electric scooter by the specs that matter: real range for your weight, brake types for wet stopping, and carry weight for daily use.
-
 Electric Scooter Safety: NTA-8776 Helmets, Braking Distance and Visibility
Electric scooter safety starts with the NTA-8776 helmet standard, understanding real braking distances, and knowing the mechanical failure modes that matter at speed.
Electric Scooter Safety: NTA-8776 Helmets, Braking Distance and Visibility
Electric scooter safety starts with the NTA-8776 helmet standard, understanding real braking distances, and knowing the mechanical failure modes that matter at speed.
-
 Electric Scooter Batteries: Wh Capacity, 21700 Cells and Real Cycle Life
Electric scooter batteries explained: why watt-hours is the honest capacity unit, how 21700 cells differ from 18650, and what actually shortens pack life.
Electric Scooter Batteries: Wh Capacity, 21700 Cells and Real Cycle Life
Electric scooter batteries explained: why watt-hours is the honest capacity unit, how 21700 cells differ from 18650, and what actually shortens pack life.
-
 Electric Scooter Commuting: Carry Weight, Folded Size and Wet Weather Reality
What electric scooter commuting actually demands: real carry weight for stairs, folded dimensions for trains, wet weather survival and charging logistics.
Electric Scooter Commuting: Carry Weight, Folded Size and Wet Weather Reality
What electric scooter commuting actually demands: real carry weight for stairs, folded dimensions for trains, wet weather survival and charging logistics.
-
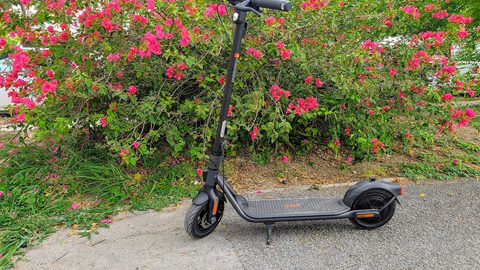 Segway Ninebot ES3
The Ninebot Segway ES3 was discontinued in 2021 but is still traded heavily used, and it remains a genuine argument as a first electric scooter.
Segway Ninebot ES3
The Ninebot Segway ES3 was discontinued in 2021 but is still traded heavily used, and it remains a genuine argument as a first electric scooter.
-
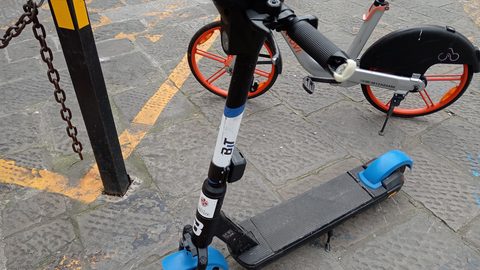 Fluid FreeRide CityRider
The Fluid Freeride CityRider is the mid-band commuter this catalogue keeps pointing people at when they arrive looking at something twice the weight.
Fluid FreeRide CityRider
The Fluid Freeride CityRider is the mid-band commuter this catalogue keeps pointing people at when they arrive looking at something twice the weight.
-
 Weped FS
The Weped FS weighs 45 kg and has real hydraulic suspension, and that weight is the organising fact of ownership no spec sheet can soften.
Weped FS
The Weped FS weighs 45 kg and has real hydraulic suspension, and that weight is the organising fact of ownership no spec sheet can soften.
-
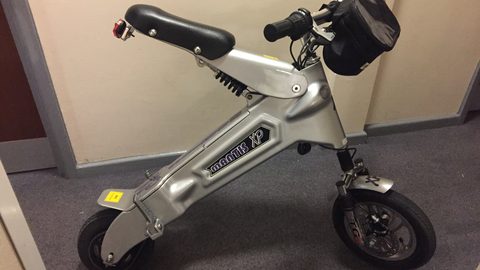 Rion RE90
The Rion RE90 is the lightest genuinely fast electric scooter, built in small numbers with almost no weather sealing and a six-month warranty.
Rion RE90
The Rion RE90 is the lightest genuinely fast electric scooter, built in small numbers with almost no weather sealing and a six-month warranty.
-
 Mercane MX60
The Mercane MX60 is a 41 kg dual-motor scooter whose real story is the gap between what it can do and what an owner will do with it daily.
Mercane MX60
The Mercane MX60 is a 41 kg dual-motor scooter whose real story is the gap between what it can do and what an owner will do with it daily.