Electric Scooter Riding Skills Every New Owner Should Practise
Learn fundamental electric scooter riding skills from first-ride stance to emergency braking, with step-by-step guides for rain, night, and hill riding.
Electric Scooter Riding Skills Every New Owner Should Practise
Most new owners learn by trial and error on the street. That is the most expensive way to learn. The eight technique guides below teach electric scooter riding skills step by step, in a safe space, before you face traffic. Each one answers a specific question and gives you a drill for an empty car park. Also covered: what to check before every ride. The condition of your scooter matters more than your reflexes.


- Pre-Ride Check Every Time: Tyre pressure (30-50 psi), brake function, stem clamp security, battery state of charge.
- Brake Type Standard: Dual braking, electronic front plus mechanical rear (disc or drum). Electronic alone is insufficient for emergency stops.
- EN 17128 Braking Distance: ≤4 m from 25 km/h on dry level surface.
- Real-World Range: 50-70% of manufacturer claim for a 75 kg rider at 25 km/h.
- Typical Tyre Pressure Loss: 1-3 psi per week on pneumatic tyres.
- Cold Weather Range Reduction: 20-30% at 0°C vs 20°C.
Your First Ride: Stance, Throttle Modulation And The Carry Technique
How To Carry The Scooter Without Breaking It
Before you touch the accelerator, learn how to carry the machine. The folding hook that secures the stem to the rear fender is not a carry handle. Snapping it by lifting the scooter by the stem while folded is a common failure mode. Use the deck or the stem below the clamp instead.
Mounting And The Kick-Start
Mount the scooter on flat ground. Place your non-dominant foot on the deck, grip the handlebars, and push off with your trailing foot as you would on a kick scooter. Only after you are rolling at walking speed do you apply the accelerator. This kick-start prevents the motor from lurching under load when you are off-balance.
Your stance: shoulder-width apart, knees slightly bent. Keep your weight centred over the deck. A narrow deck forces a side-by-side stance that reduces control under braking, so stand with feet parallel, not one behind the other. Practise rolling in a straight line at 8 km/h before you touch the accelerator again.
Stopping Safely: Emergency Stop Technique And Brake System Understanding
Most riders learn that their scooter's brake does not stop them as fast as they expected only when a car pulls out. The emergency stop technique requires weight shift and simultaneous use of both brakes.
Shift your weight backward over the rear wheel as you squeeze the brake lever. The rear wheel carries most of the stopping force because weight transfer unloads the front wheel. If you brake hard with only the front electronic brake, the rear wheel can lift and you will go over the handlebars.
The typical scooter has a dual braking system: an electronic regenerative brake on the front wheel and a mechanical disc or drum brake on the rear. The electronic brake alone is not sufficient for an emergency stop. All reputable manufacturers acknowledge this. Practise the emergency stop from 15 km/h in an empty car park. The goal is a controlled deceleration without the rear wheel skidding or the front wheel lifting.
How To Ride An E-Scooter Safely In Wet Weather
Riding in rain is the most common cause of scooter damage that warranty departments deny. An IP rating is tested on a new unit in a laboratory. After months of use, water enters through the deck seam, the accelerator control, and the display. The warranty exclusion for water damage is near-universal.
If you must ride in wet weather, reduce speed by one third. Wet surfaces cut tyre grip by roughly half, and the stopping distance doubles. Aquaplaning on a scooter is possible above 20 km/h on standing water. You will feel the steering go light. Do not brake or turn. Roll straight and reduce speed gradually.
Visibility in rain is worse for drivers than for you. Wear a hi-vis vest with reflective strips and use the scooter's front and rear lights even in daylight. The EN 17128 standard requires a white front light, red rear light, red rear reflector, and amber side reflectors. If your scooter does not meet that, do not ride it in wet weather.
After a wet ride, dry the scooter with a cloth and store it indoors. Water trapped in the battery compartment or controller housing will cause corrosion over weeks, not hours.
Climbing Hills On Electric Scooter: Grade, Voltage Sag And Controller Limits
What Happens To Power On A Steep Grade
Every scooter has a hill grade it cannot climb. The manufacturer's hill-climb angle figure is measured at full charge with a lightweight rider. Real gradient ability degrades below 40% state of charge.
On a hill, shift your weight forward to keep the front wheel planted. Apply the accelerator smoothly. Jerking the control causes the controller to draw peak current, which can trigger the controller thermal limit on a long climb. If the scooter slows to walking pace, step off and walk it. Pushing a scooter up a hill under power with the motor stalled generates heat that can damage the controller MOSFETs.
Voltage Sag And Controller Cut-Out
Voltage sag is the drop in battery voltage under load. On a steep hill, the voltage can drop below the low-voltage threshold of the battery management system, which cuts power entirely. You will coast downhill with no brakes unless you have a mechanical rear brake. The BMS lockout is a common failure mode after repeated hill climbs at low battery.
A scooter with a sine wave controller handles hills better than one with a square wave controller because the sine wave delivers smoother torque at low speed. Most new models above the budget tier use sine wave controllers now.
Riding At Night: Lights, Reflectives And Head Checks
At night, you are invisible to drivers until you light up. The EN 17128 standard mandates a white front light, red rear light, red rear reflector, and amber side reflectors. Many scooters sold below the commuter tier do not meet this. Test your lights in the dark before you ride. If the beam is too dim to illuminate the road surface 10 m ahead, install an aftermarket handlebar light.
Wear reflectives on your ankles and wrists. Drivers see moving reflectives before they see stationary ones because the movement triggers peripheral vision. A head check is the only reliable way to see traffic beside you. Twist your torso, not just your head, to keep the handlebars steady.
Reduce speed by half on unlit roads. A pothole that is visible in daylight becomes a crash at night. The inner tube pinch flat is the most common field repair after hitting a kerb or pothole at speed.
| Skill Area | Question The Guide Answers | Where To Practise |
|---|---|---|
| Stance And Mounting | How do I stand on the deck and start rolling without falling? | Empty car park, flat surface |
| Throttle Modulation | How do I accelerate smoothly without jerking? | Long straight path, no obstacles |
| Emergency Stop | How do I stop as short as possible without going over the handlebars? | Empty car park, mark a stop line |
| Wet Weather Riding | How do I ride safely in rain and what do I do after a wet ride? | Only if essential; practise on dry ground first |
| Night Riding | What lights and reflectives do I need and how do I check them? | Dark car park or quiet street |
| Hill Climbing | How do I climb a steep hill without damaging the motor or battery? | Gentle hill first, then steeper grade |
| Carry Technique | How do I carry the scooter without breaking the folding hook? | At home, before you ride |
| Head Check And Shoulder Look | How do I check for traffic without wobbling the handlebars? | Straight line at walking speed |
Pre-Ride Check: What To Inspect Before Every Ride
Four checks take thirty seconds and prevent the most common failure modes.
Tyre Pressure
Pneumatic tyres lose 1-3 psi per week. At low pressure, the rim contacts the ground on a bump and pinches the inner tube. That is a pinch flat, the single most common field repair. The range is 30-50 psi. Check with a gauge, not by squeezing the tyre.
Brake Function
Squeeze the lever before you mount. The lever should not travel more than halfway to the handlebar before engaging. If it does, the cable has stretched or the pads are worn. Brake pad replacement interval is 400-800 km on disc brakes.
Stem Clamp Security
The folding mechanism is the highest-consequence mechanical joint on the vehicle. Stem bolt loosening is reported across multiple brands from 2018 to 2025. Check that the clamp is tight and the stem does not wobble when you push the handlebars side to side. The torque spec for a typical M8 grade 12.9 bolt is 25 Nm. Check every 100-200 km.
Battery State Of Charge
Do not ride below 20% if you have a hill or a long return leg. Voltage sag on a low battery can trigger the BMS lockout and leave you coasting.
More in Riding skills
-
 Braking technique
Learn progressive braking technique for electric scooters, why the front brake does most of the work, and how wet roads change your stopping distance.
Braking technique
Learn progressive braking technique for electric scooters, why the front brake does most of the work, and how wet roads change your stopping distance.
-
 Riding at night
Ride an electric scooter safely at night with proper lights, reflective gear placement, and speed adjusted to match your headlight beam distance.
Riding at night
Ride an electric scooter safely at night with proper lights, reflective gear placement, and speed adjusted to match your headlight beam distance.
-
 Riding in the rain
Understand the real limits of IP-rated water resistance on electric scooters, how to ride safely in rain, and why water damage warranties are routinely denied.
Riding in the rain
Understand the real limits of IP-rated water resistance on electric scooters, how to ride safely in rain, and why water damage warranties are routinely denied.
-
 Your first electric scooter ride
Learn the correct stance, gentle throttle control, and safe practice space for your first electric scooter ride before you enter traffic.
Your first electric scooter ride
Learn the correct stance, gentle throttle control, and safe practice space for your first electric scooter ride before you enter traffic.
Common Questions
How long does it take to learn basic electric scooter riding skills?
Most riders can practise the stance, kick-start, and gentle accelerator modulation in one session of 20 minutes. The emergency stop takes longer because it requires weight shift that feels unnatural at first. Plan three sessions of 15 minutes each in an empty car park.
What is the most common mistake new riders make?
Applying full power from a standstill without a kick-start. The motor lurches, the rider leans back to compensate, and the scooter accelerates out from under them. Always push off with your foot before touching the accelerator.
Can I ride an electric scooter in the rain?
You can, but every manufacturer voids water damage from warranty claims. IP ratings are tested on new units only. After months of use, seals degrade and water enters through the deck seam, accelerator control, and display. If you must ride in rain, reduce speed by one third and dry the scooter thoroughly afterwards.
How do I stop quickly without going over the handlebars?
Shift your weight backward over the rear wheel as you squeeze both brakes. The rear wheel carries most of the stopping force. Braking with only the front electronic brake causes the rear wheel to lift. Practise from 15 km/h in a safe space.
Why does my scooter lose power on a hill?
Two reasons. Voltage sag drops the battery voltage below the BMS threshold, which cuts power. And the controller thermal limit shuts down the motor to protect the MOSFETs from overheating. Shift weight forward, apply the accelerator smoothly, and step off if the scooter slows to walking pace.
What is the minimum tyre pressure I should ride on?
30 psi for most pneumatic tyres. Below that, the tyre bottoms out on bumps and the rim pinches the inner tube. That is a pinch flat. Check tyre pressure weekly with a gauge.
How do I carry my scooter without breaking it?
Do not lift it by the stem when folded. The folding hook that secures the stem to the rear fender is not a carry handle. Snapping it is a common failure mode. Lift by the deck or by the stem below the folding clamp.
Read next
-
Braking technique
Learn progressive braking technique for electric scooters, why the front brake does most of the work, and how wet roads change your stopping distance.
-
Riding in the rain
Understand the real limits of IP-rated water resistance on electric scooters, how to ride safely in rain, and why water damage warranties are routinely denied.
-
Riding at night
Ride an electric scooter safely at night with proper lights, reflective gear placement, and speed adjusted to match your headlight beam distance.
-
Your first electric scooter ride
Learn the correct stance, gentle throttle control, and safe practice space for your first electric scooter ride before you enter traffic.
-
 Long Range Electric Scooters With Owner-Reported Distance at Real Rider Weight
Long-range electric scooters ranked by owner-reported distance at a real rider weight, not the manufacturer's 60 kg eco-mode claim, with battery capacity in watt-hours.
Long Range Electric Scooters With Owner-Reported Distance at Real Rider Weight
Long-range electric scooters ranked by owner-reported distance at a real rider weight, not the manufacturer's 60 kg eco-mode claim, with battery capacity in watt-hours.
-
 Best Electric Scooters for Adults: Commuter, Heavy Rider and Multi-Modal Picks
The best electric scooter for adults depends entirely on your commute: lightweight folders for train riders, durable tubeless models for daily abuse, and reinforced frames for heavier riders.
Best Electric Scooters for Adults: Commuter, Heavy Rider and Multi-Modal Picks
The best electric scooter for adults depends entirely on your commute: lightweight folders for train riders, durable tubeless models for daily abuse, and reinforced frames for heavier riders.
-
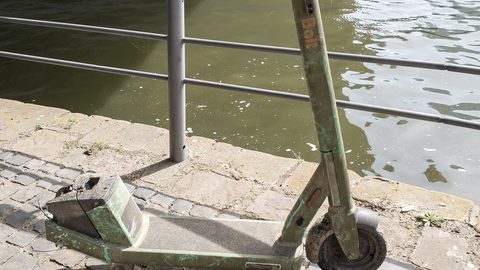 Best Electric Scooter: The Models That Earn Their Spec Sheet in the Real World
The best electric scooter is the one whose real range, brake type, and stem durability match what the spec sheet promises. We compare the models that deliver.
Best Electric Scooter: The Models That Earn Their Spec Sheet in the Real World
The best electric scooter is the one whose real range, brake type, and stem durability match what the spec sheet promises. We compare the models that deliver.
-
 Best Electric Scooter Lights for Actually Seeing the Road at Night
Stock scooter lights are position markers, not headlights. The best electric scooter lights mount securely, survive rain, and project a beam you can actually ride by.
Best Electric Scooter Lights for Actually Seeing the Road at Night
Stock scooter lights are position markers, not headlights. The best electric scooter lights mount securely, survive rain, and project a beam you can actually ride by.