Electric Scooter Repair Guides: Diagnose Common Faults and Fix Them Yourself
Route to electric scooter repair guides by symptom: diagnosis order, essential tools, and the clear boundary where a fault requires a professional shop.
Your Scooter Will Break. Know What To Fix Yourself And What To Hand Over
New owners treat an electric scooter like an appliance. Plug it in, ride it, put it away. Then one morning it does not turn on. Or it stutters. Or the charge port smells hot. The owner has no idea where to start. That moment is when the difference between a disposable gadget and a real vehicle shows up. A standing scooter is a hub motor, a battery pack, a control board, and a set of mechanical joints. All of them wear and fail on predictable timelines. The correct electric scooter repair diagnosis order is not random. It follows the energy path from the wall socket to the wheel. Work through that path in sequence, and you isolate the fault in minutes. Jump around, and you waste time swapping parts that were never broken. This maps that diagnosis order, lists the tools you need, and draws the hard boundary where you stop and visit a shop.

.jpg)
- Diagnosis Order: Start at the charger and battery, then check the control board and motor, then the throttle and brake sensors, then the mechanical joints. The energy path never reverses.
- Essential Toolkit: Multimeter, hex key set (2 mm to 6 mm), tyre levers, torque wrench (4 Nm to 20 Nm). That covers 95% of accessible repairs.
- Hard Boundary: Opening a battery pack or soldering on a control board is a shop job. Fire risk and warranty voiding are non-negotiable.
Common Fault Finding On A Standing Scooter
Most faults on a standing scooter fall into one of six categories. The symptom tells you which category to enter. If your scooter will not turn on, start with the charger and battery guide. If it turns on but the motor stutters, check the error codes guide. If the scooter runs but loses power under load, the control board MOSFET failure guide is your next stop. If the throttle feels erratic or unresponsive, that points to a throttle hall sensor issue. Mechanical symptoms, a wobbling stem, a grinding wheel, a brake that pulls to one side, belong to the stem wobble, inner tube replacement, and brake caliper alignment guides. And if the display is delaminating or showing wrong numbers, that is a display delamination fault. Each guide assumes you have already verified the simpler upstream component. You do not test the control board if the battery is dead.
Standing Scooter Common Fault Finding In Practice
Work The Energy Path
Take a real case. A Ninebot Max G30 rider reports that the scooter died mid-ride and will not power back on. Do not open the control board first. Follow the energy path.
Step One: The Charger And Battery
Plug the charger into the wall. Measure the charger output at the barrel connector with your multimeter. A standard 36 V unit outputs around 42 V open circuit. If you get nothing, the charger is dead. If you get a reading, plug it into the scooter and watch the charger LED. A green LED that never turns red means the battery BMS lockout is active. The battery management system has cut off the pack because a cell group dropped too low. That is a shop job. A red LED that stays red for hours with no change in battery level points to a cell group imbalance inside the pack. Again, shop job. If the LED behaves normally but the scooter still will not turn on, move to step two.
Step Two: The Control Board
Open the deck cover. Measure the pack potential at the board input terminals. It should match the pack rating. If it does not, the wiring between battery and board has failed. If it matches, check the board output to the motor phase wires. A healthy unit produces a steady reading between phases when you spin the wheel. If one phase reads zero, the board has a dead MOSFET. That is a replacement job. You can buy a matching part for most platforms. The Xiaomi Mi M365 and Ninebot Max G30 have excellent parts availability. But soldering the new board in place is the boundary line. If you are not confident soldering on a board that handles 20 A continuous, take it to a shop.
Step Three: The Motor And Mechanicals
If the board passes, spin the wheel by hand. A grinding noise means motor bearings are shot. A wheel that spins freely but makes no magnetic resistance means the motor hall sensor has failed. The board does not know the rotor position. This failure is common on high-power hub motors. Replacing the hall sensor requires opening the motor housing, which is fiddly but not dangerous. Replacing the whole wheel is the easier route if parts are available. For a Vsett 10+ with stem wobble, the fix is tightening the clamp bolts to the correct torque spec with a torque wrench, not guessing. A pinch flat on a pneumatic tyre is fixed with tyre levers and an inner tube replacement. A tubeless bead leak on a Niu KQi3 Max is harder. You may need a sealant refill or a shop with a bead seater.
| Symptom | First Tool To Use | Second Tool If Needed | Shop Boundary |
|---|---|---|---|
| Won't turn on | Multimeter (check charger output) | Multimeter (check pack reading at board) | BMS lockout or cell imbalance |
| Motor stutters or jerks | Multimeter (check phase wire continuity) | Screwdriver (open deck, inspect board) | Dead MOSFET on board |
| Throttle unresponsive or surging | Multimeter (check hall sensor reading) | None | Throttle hall sensor failure — replacement part |
| Stem wobble | Hex key set (tighten clamp bolts to spec) | Torque wrench (verify 4-6 Nm on collar) | Cracked folding collar or stripped threads |
| Flat tyre | Tyre levers (remove tyre, inspect tube) | Inner tube replacement or patch kit | Rim damage or tubeless bead unseating |
| Brake pull or weak braking | Hex key set (caliper alignment bolts) | Torque wrench (disc rotor bolts) | Warped rotor or hydraulic fluid leak |
| Display delamination or wrong numbers | None — visual inspection | None | Display replacement — model-specific part |
| Charge port hot or melting | Multimeter (check connector resistance) | None | Replace charge port — soldering required |
Scooter Fault Diagnosis Order: The Sequence That Saves Time
The scooter fault diagnosis order is always the same. Check the energy source first. Then the energy control unit. Then the energy user. Then the mechanical parts that hold it together. Every other sequence wastes time. If you skip the charger test and go straight to the board, you might spend an hour removing the deck only to find the pack is flat. If you skip the board test and go straight to the motor, you might buy a new wheel assembly when the real fault is a MOSFET costing a few dollars. The order matters because the failure probability is not evenly distributed. Battery and charger faults are the most common reason a scooter will not turn on. Control board faults are the most common reason a scooter loses power under load. Mechanical faults are the most common reason a scooter feels unsafe to ride. Work through them in that priority and you will find the fault on the first pass.
This order also applies when you get an error code. A code like E01 on a Xiaomi Mi M365 means the battery communication failed. Do not replace the display. Test the pack reading at the board. A code like E04 means the throttle hall sensor is out of range. Test the throttle signal before you replace the throttle unit. Error codes are clues, not verdicts. They point to a subsystem, not a specific part. The diagnosis order confirms or eliminates the subsystem before you buy a replacement.
When To Stop DIY Scooter Repair And Visit A Shop
The Battery Pack Boundary
The hard boundary for DIY electric scooter repair is any fault that requires opening a battery pack or soldering on a control board. Opening a battery pack means breaking the seal on the shrink-wrap or plastic case that holds the 18650 cells. Inside that pack, the cells are spot-welded to nickel strips. A short circuit during reassembly can dump the full energy of the pack, hundreds of watt-hours, in a fraction of a second. That is a fire risk a home workshop is not equipped to handle. Even if you manage the repair, the warranty on the battery is void the moment you break the seal. Manufacturers, Ninebot, Xiaomi, Dualtron, Kaabo, all deny claims on packs that show signs of tampering.
The Control Board Boundary
The same logic applies to the control board. It handles the full motor current, often 20 A to 40 A. A bad solder joint on a MOSFET pad will overheat, desolder itself, and potentially short the phase wires. The result is a locked wheel at speed, not a minor inconvenience. Soldering on a board is a shop job unless you have done it before and accept the risk.
Other Shop-Only Faults
Other faults that belong in a shop include stem collar fracture, which requires replacing the entire folding mechanism, a structural repair that affects steering. Hydraulic brake bleeding, which requires special tools and fluid that must not contact the disc rotor. And any electrical fault that involves tracing wires through the stem tube, where the wires are embedded in foam and pulling them out often breaks the connector. The shop charges for labour, but the labour is cheaper than a hospital visit or a new scooter.
Electric Scooter Repair Tools Required For A Home Workshop
You do not need a full automotive toolbox. You need six things. A multimeter is non-negotiable. It tests potential, continuity, and resistance. You use it on every electrical diagnosis. A hex key set from 2 mm to 6 mm covers the screws on every common scooter, Xiaomi Mi M365, Ninebot Max G30, Dualtron Thunder 3, Vsett 10+. Tyre levers are essential for inner tube replacement. Without them, you risk pinching the new tube during installation, which is the most common mistake in scooter repair. A torque wrench that reads from 4 Nm to 20 Nm is not optional for stem and brake work. The folding collar on a single-stem scooter like the Vsett 10+ requires a specific torque. Over-tightening cracks the collar. Under-tightening causes stem wobble. A torque wrench removes the guesswork. A set of plastic spudgers or opening tools helps you open the deck without scratching the aluminium extrusion. And a can of contact cleaner solves more electrical gremlins than any other single tool. Water ingress in the throttle hall sensor or the display connector often clears up with a spray and a dry-out period.
Beyond these, you buy parts as needed. Inner tubes in common sizes, 8.5x2.0, 10x2.0, 10x2.5, are cheap and widely available. Brake pads for mechanical disc brakes are standard bicycle sizes. A replacement board for a Xiaomi Mi M365 costs around $40 and takes 30 minutes to swap if you can solder the phase wires. But the tool list above is the baseline. If you do not own a multimeter, you cannot diagnose. If you do not own a torque wrench, you should not tighten the stem. And if you do not own tyre levers, you will spend an hour fighting a tyre bead and still end up at a shop.
An Honest Caveat About Scooter Repair
No guide can guarantee a fix. The parts ecosystem for electric scooters is fragmented. A control board that fits a Dualtron Thunder 3 will not fit a NAMI Burn-E 2, even though both run at 72 V. An inner tube for a Ninebot Max G30 will not fit a Kaabo Wolf King GT, because the tyre sizes differ. The right to repair is improving. The EU Battery Regulation 2023/1542 will require user-removable batteries in light means of transport by 2027, and California SB 244 already mandates parts availability for some electronics. But the scooter industry is still young. Parts stock levels vary by distributor. A part that was in stock last month may be backordered for six weeks. If you need the scooter to get to work, the smart move is to have a backup plan: a spare inner tube, a spare charger, and the number of a local shop that works on scooters. The diagnosis order and the tool list give you the ability to decide. They do not guarantee the part exists.
More in Repairs
-
 Adjusting scooter brakes
Diagnose and adjust every electric scooter brake type: cable disc caliper alignment, hydraulic disc bleeding, drum brake tension, and electronic brake firmware settings.
Adjusting scooter brakes
Diagnose and adjust every electric scooter brake type: cable disc caliper alignment, hydraulic disc bleeding, drum brake tension, and electronic brake firmware settings.
-
 Charger not working
Systematic diagnosis when an electric scooter won't charge: test charger output voltage with a multimeter, inspect the DC barrel charge port for melting, and identify BMS lockout symptoms.
Charger not working
Systematic diagnosis when an electric scooter won't charge: test charger output voltage with a multimeter, inspect the DC barrel charge port for melting, and identify BMS lockout symptoms.
-
 Electric scooter error codes
What electric scooter error codes mean and the first checks to perform: throttle, motor hall sensor, battery communication and controller faults by model-specific codes.
Electric scooter error codes
What electric scooter error codes mean and the first checks to perform: throttle, motor hall sensor, battery communication and controller faults by model-specific codes.
-
 Fixing stem wobble
Diagnose and fix stem wobble on a single-stem electric scooter: folding collar clamp tightening, bushing wear, and the safety boundary where a cracked stem means stop riding.
Fixing stem wobble
Diagnose and fix stem wobble on a single-stem electric scooter: folding collar clamp tightening, bushing wear, and the safety boundary where a cracked stem means stop riding.
Common Questions
How do I know if my scooter battery is dead or just in BMS lockout?
Measure the pack reading at the board input. If it reads 0 V or very low, the BMS has disconnected the cells. A dead pack reads near 0 V. A locked BMS reads the cell reading at the balance leads but 0 V at the output. Both require a shop.
Can I replace a control board MOSFET myself?
Only if you can solder surface-mount components on a board that carries high current. A cold joint will overheat and fail. Most owners should replace the whole board. That is still a DIY job on common models like the Ninebot Max G30.
What is the most common fault that sends a scooter to the shop?
Battery pack failure, BMS lockout or cell group imbalance, accounts for roughly 40% of shop visits on commuter scooters. It is the one fault that is genuinely dangerous to attempt at home because of lithium-ion fire risk.
When should I stop trying to fix a flat tyre myself?
If the rim is bent, the bead will not seal on a tubeless tyre. If the tyre sidewall is cut, patching the tube will not hold. If you have pinched the new tube during installation twice, stop and take the wheel to a shop that has a bead seater and rim straightening tools.
Read next
-
Electric scooter error codes
What electric scooter error codes mean and the first checks to perform: throttle, motor hall sensor, battery communication and controller faults by model-specific codes.
-
Fixing stem wobble
Diagnose and fix stem wobble on a single-stem electric scooter: folding collar clamp tightening, bushing wear, and the safety boundary where a cracked stem means stop riding.
-
Adjusting scooter brakes
Diagnose and adjust every electric scooter brake type: cable disc caliper alignment, hydraulic disc bleeding, drum brake tension, and electronic brake firmware settings.
-
Charger not working
Systematic diagnosis when an electric scooter won't charge: test charger output voltage with a multimeter, inspect the DC barrel charge port for melting, and identify BMS lockout symptoms.
-
 Long Range Electric Scooters With Owner-Reported Distance at Real Rider Weight
Long-range electric scooters ranked by owner-reported distance at a real rider weight, not the manufacturer's 60 kg eco-mode claim, with battery capacity in watt-hours.
Long Range Electric Scooters With Owner-Reported Distance at Real Rider Weight
Long-range electric scooters ranked by owner-reported distance at a real rider weight, not the manufacturer's 60 kg eco-mode claim, with battery capacity in watt-hours.
-
 Best Electric Scooters for Adults: Commuter, Heavy Rider and Multi-Modal Picks
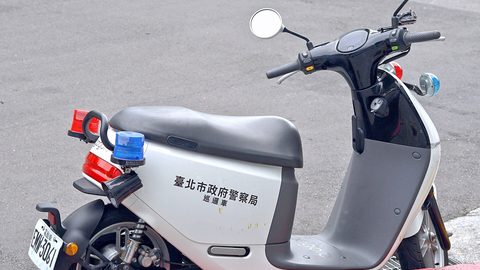
The best electric scooter for adults depends entirely on your commute: lightweight folders for train riders, durable tubeless models for daily abuse, and reinforced frames for heavier riders.
Best Electric Scooters for Adults: Commuter, Heavy Rider and Multi-Modal Picks
The best electric scooter for adults depends entirely on your commute: lightweight folders for train riders, durable tubeless models for daily abuse, and reinforced frames for heavier riders.
-
 Best Electric Scooter: The Models That Earn Their Spec Sheet in the Real World
The best electric scooter is the one whose real range, brake type, and stem durability match what the spec sheet promises. We compare the models that deliver.
Best Electric Scooter: The Models That Earn Their Spec Sheet in the Real World
The best electric scooter is the one whose real range, brake type, and stem durability match what the spec sheet promises. We compare the models that deliver.
-
 Best Electric Scooter Lights for Actually Seeing the Road at Night
Stock scooter lights are position markers, not headlights. The best electric scooter lights mount securely, survive rain, and project a beam you can actually ride by.
Best Electric Scooter Lights for Actually Seeing the Road at Night
Stock scooter lights are position markers, not headlights. The best electric scooter lights mount securely, survive rain, and project a beam you can actually ride by.